$0.00

No products in the cart.

Home Blog Page 2

5 Easy Science Projects to Try This Weekend

0

Science is all around us, and itโ€™s far more fun when youโ€™re the one making the discoveries! Whether youโ€™re into physics, chemistry, biology, or just love a good hands-on project, thereโ€™s no better way to spend a weekend than by diving into a few quick and easy science experiments. These projects are designed to be simple, educational, andโ€”most importantlyโ€”fun. So grab your lab coat (or just your old T-shirt), roll up your sleeves, and letโ€™s get started with five science projects that you can do right at home.


1. The Classic Volcano Eruption โ€“ A Fiery Chemical Reaction

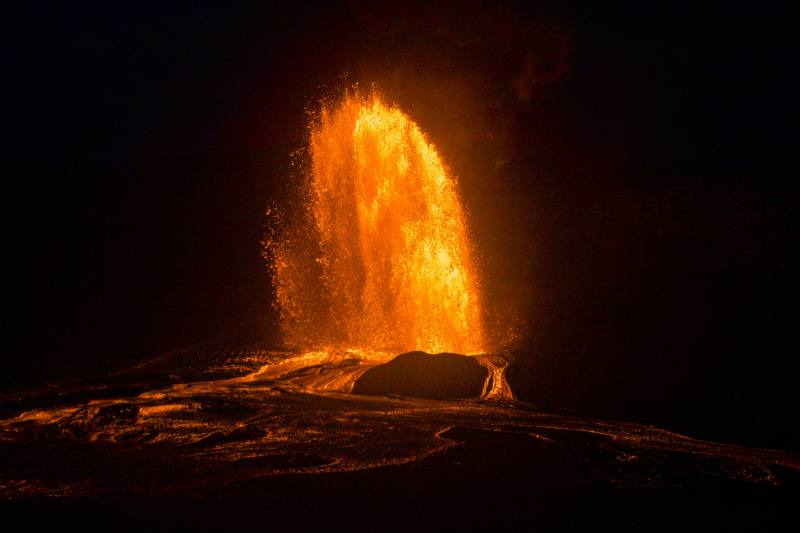
No science project list would be complete without the iconic volcano eruption! This experiment is the perfect blend of chemistry and a bit of drama. Youโ€™ll be amazed at how easy it is to create an explosive reaction right in your own kitchen.

What Youโ€™ll Need:

  • A plastic bottle or small container
  • Baking soda
  • Vinegar
  • Dish soap (optional, for extra foam)
  • Food coloring (optional, for lava effect)
  • A tray or large pan (to catch the mess)

How to Do It:

  1. Place your plastic bottle or container in the center of your tray.
  2. Fill the container about one-quarter full with baking soda.
  3. Add a few drops of dish soap if you want some extra foamy lava, and a few drops of food coloring for a dramatic effect.
  4. Pour in vinegar slowly and watch as your volcano erupts with a bubbly, frothy explosion!

The Science Behind It:
When vinegar (acetic acid) combines with baking soda (sodium bicarbonate), it creates carbon dioxide gas, which causes the bubbly eruption. The more vinegar you add, the bigger the eruption!


2. The Dancing Raisin โ€“ Explore Buoyancy & Gas Bubbles

This project is a fun way to explore the concept of buoyancy and the effect of gas bubbles. Plus, itโ€™s a cool trick that never gets oldโ€”watch raisins dance in a glass of fizzy soda!

What Youโ€™ll Need:

  • A glass of carbonated soda (preferably clear, like Sprite or club soda)
  • A few raisins (or any small, sinkable object)

How to Do It:

  1. Fill your glass with soda.
  2. Drop a few raisins into the soda.
  3. Watch as the raisins sink to the bottom of the glass, then rise up and down repeatedly. Itโ€™s like theyโ€™re dancing!

The Science Behind It:
The bubbles of carbon dioxide in the soda attach to the rough surface of the raisins. These bubbles lift the raisins to the surface. Once the bubbles pop, the raisins sink again. This cycle repeats as long as there are bubbles in the soda!


3. Invisible Ink โ€“ Write Secret Messages with Chemistry

Want to send secret messages? Try using invisible ink! This project uses basic chemistry to write messages that are invisible to the naked eye but can be revealed with heat. Itโ€™s like being a spy or a detective!

What Youโ€™ll Need:

  • Lemon juice (or milk)
  • A cotton swab (or paintbrush)
  • White paper
  • A heat source (like a light bulb, hairdryer, or an iron)

How to Do It:

  1. Dip the cotton swab into lemon juice or milk.
  2. Use the swab to write your secret message on the paper.
  3. Allow the paper to dry completely.
  4. To reveal the hidden message, hold the paper near a light bulb or use a hairdryer on the lowest setting to heat it up. Watch as the message slowly appears!

The Science Behind It:
Lemon juice (or milk) contains organic compounds that oxidize and turn brown when heated. When you write with it, it becomes invisible, but when you apply heat, the oxidation process reveals the message.
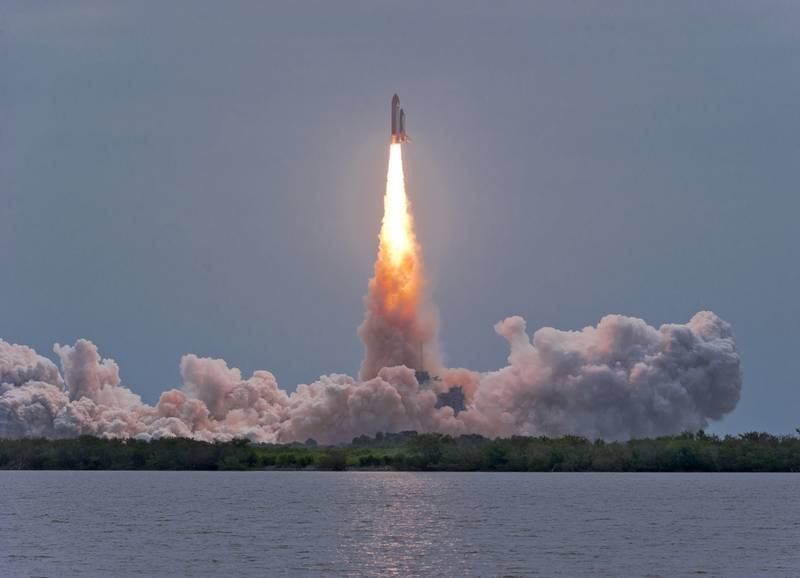

4. The Balloon Rocket โ€“ Blast Off with Newtonโ€™s Laws of Motion

John-A-Davis/shutterstock

Ready to send something zooming across the room? The balloon rocket experiment uses Newton’s third law of motionโ€”for every action, there is an equal and opposite reaction. Watch as your balloon shoots across a string, powered only by air!

What Youโ€™ll Need:

  • A balloon
  • A long piece of string
  • A straw
  • Tape
  • A chair or two to tie the string between

How to Do It:

  1. Tie one end of the string to a chair or some other stable object.
  2. Thread the string through the straw.
  3. Inflate the balloon but donโ€™t tie itโ€”just pinch the end to keep the air in.
  4. Tape the balloon to the straw so that itโ€™s pointing in the direction you want it to fly.
  5. Let go of the balloon and watch it zoom along the string as the air rushes out!

The Science Behind It:
As the air inside the balloon is released, it pushes against the opening, causing the balloon to fly in the opposite direction. This is a demonstration of Newtonโ€™s third law, where the air rushing out is the action, and the balloon moving forward is the equal and opposite reaction.


5. The Homemade Lava Lamp โ€“ Creating Colorful Convection Currents

This simple but mesmerizing project creates your very own lava lamp at home, showing you how liquids of different densities can create convection currents.

What Youโ€™ll Need:

  • A clear bottle or jar
  • Vegetable oil
  • Water
  • Food coloring
  • Alka-Seltzer tablets (or baking soda and vinegar if you prefer)

How to Do It:

  1. Fill your bottle about three-quarters full with vegetable oil.
  2. Add water to the bottle until it’s nearly full. Youโ€™ll notice that the water sinks to the bottom, and the oil floats on topโ€”this is because water is denser than oil.
  3. Add a few drops of food coloring to the water layer.
  4. Drop in an Alka-Seltzer tablet and watch as colorful bubbles rise and fall in a lava-lamp effect!

The Science Behind It:
The oil and water donโ€™t mix because of their different densities. When you add the Alka-Seltzer, it produces bubbles of carbon dioxide gas that rise through the water layer, carrying the colored water with them. As the bubbles reach the top and pop, the colored water falls back down, creating a beautiful lava lamp effect!


Final Thoughts โ€“ Science is Everywhere

There you have itโ€”five easy science projects that you can try out this weekend! Each one is a fun, hands-on way to learn about the amazing world of science, and with just a few basic materials, you can create experiments that explode, dance, vanish, fly, and bubble. Whether youโ€™re just getting started with science or youโ€™re a seasoned experimenter, these projects will spark your curiosity and keep you entertained for hours.

So next weekend, gather your materials, grab a few friends (or go solo), and let your inner scientist loose. Who knows? Maybe your next big discovery is just one experiment away!

Mastering the Art of the Perfect Campfire: Tips & Tricks

0

There’s something primal about a campfire. The crackling flames, the warmth on your face, and the smell of wood burning are all part of what makes camping under the stars so unforgettable. But a great campfire doesnโ€™t just happenโ€”it takes a little knowledge, some patience, and a few tricks up your sleeve to truly master the art of the perfect campfire.

Whether youโ€™re out in the wild or just having a backyard cookout, hereโ€™s how to build a fire thatโ€™ll not only keep you warm, but will be the heart of your adventure.


Step 1: Gather Your Materials โ€“ The Building Blocks

Before you light the match, youโ€™ll need to gather the right materials. This is where the real art comes inโ€”having the right fuel can make all the difference. Hereโ€™s what youโ€™ll need:

  • Tinder: The first layer of your fire, tinder is the material that will catch the spark and get the fire going. You can use dry leaves, pine needles, grass, or even cotton balls soaked in petroleum jelly. For the best results, try to collect tinder thatโ€™s as dry as possible. Tinder is the sparkโ€™s best friend.
  • Kindling: This is the next layer of your fire and should be small sticks or twigs (about the size of a pencil). Kindling catches the flame from the tinder and helps the fire grow. The key here is to gather kindling thatโ€™s dry and small enough to ignite easily but large enough to sustain the fire as it grows.
  • Fuel Wood: This is the main wood that will keep your fire going. Use medium to large pieces of wood, such as logs, that will burn for a long time. When selecting your fuel wood, pick up dead, dry wood (but donโ€™t cut down live trees!). Hardwoods like oak, hickory, and maple are ideal for a slow-burning fire, while softer woods like pine will burn fast and hot but wonโ€™t last as long.

Step 2: Building the Fire โ€“ Crafting the Base

Now that youโ€™ve got your materials, itโ€™s time to build the fire. There are several classic techniques you can use, each with its own advantages:

  • The Teepee: This is the classic campfire shape that we all picture when we think of a fire. Place a bundle of tinder in the center of your fire pit, and then arrange your kindling around it in the shape of a teepee. Leave gaps between the sticks to allow air to flow in and help the fire catch. As the fire grows, slowly add larger pieces of fuel wood to the structure. The teepee shape allows the fire to burn intensely and evenly.
  • The Log Cabin: This method works well when you want a fire that burns longer and steadier. Start with a small teepee of tinder and kindling in the center, then build a square around it using larger logs, like youโ€™re constructing a miniature log cabin. The logs will stack in a crisscross pattern, allowing air to circulate and feed the flames.
  • The Lean-To: For a more compact fire, use a leaning structure. Place a larger log on the ground as your base, then lean smaller pieces of wood against it in a tepee-like formation. This structure is great if youโ€™re in a sheltered spot and donโ€™t need as much airflow. It also makes it easier to add wood during the night without disturbing the fire too much.

Step 3: Lighting the Fire โ€“ The Spark of Life

Once your fire is built, itโ€™s time to bring it to life. Here are some tried-and-true methods to light your campfire:

  • Matches or Lighter: The simplest and most common method is using a match or a lighter. Be sure to strike the match away from the wind and light the tinder first, then gradually add kindling. A good trick is to light several areas of the tinder at once to ensure an even burn.
  • Flint and Steel: For a more traditional approach, use flint and steel. Strike the steel against the flint to create sparks, and direct them toward the tinder. This method is tougher but will make you feel like a true wilderness expert. Keep practicing, and soon youโ€™ll be starting fires like a true pioneer!
  • Firestarter: If youโ€™re looking for a shortcut (and a bit more convenience), you can use a firestarterโ€”these can be anything from chemical firelighters to homemade fire starters made from wax and sawdust. These little fire helpers work wonders when conditions are damp or the wind is too strong.

Step 4: Maintaining the Fire โ€“ Keeping the Flames Alive

Once your fire is roaring, youโ€™ll need to maintain it for warmth, cooking, or just good old-fashioned ambiance. Hereโ€™s how to keep your fire burning bright:

  • Air Flow Is Key: A fire needs oxygen to burn properly. If the flames start to die down, gently blow on the base of the fire, or use a stick to shift the logs around and open up gaps for air. Donโ€™t smother the fire by piling too much wood on top too quicklyโ€”let it breathe!
  • Donโ€™t Overload: While it may be tempting to keep adding logs to the fire, too much wood too quickly can suffocate the flames. Add fuel gradually, allowing the fire to catch each new log before adding more. You can always add more later when the fire is strong enough to handle it.
  • Manage the Heat: If you need to reduce the intensity of the fire, simply move the logs around to let the flames cool a bit. If you want to create a hot, concentrated flame (say, for cooking or melting something), stack your logs in a pyramid shape to concentrate the heat.

Step 5: Putting Out the Fire โ€“ Safety First

When youโ€™re done with your fire, you must put it out properly to prevent any risk of wildfires. Here’s how to ensure your fire is safely extinguished:

  • Drown the Fire: Pour water directly onto the fire until itโ€™s completely out. Make sure to pour it on the coals and ashes, not just the flames, and stir it around with a stick to make sure every bit of embers is soaked.
  • Stir and Check: After you pour water on it, stir the ashes and check for any glowing embers. If theyโ€™re still glowing, add more water and stir again. When everything is cold to the touch, youโ€™re done.
  • Leave No Trace: Always make sure to clean up the fire site. Pack out any trash, broken wood, and debris, leaving the campsite just as you found it (or better!).

Final Thoughts โ€“ The Heart of the Camp

Mastering the perfect campfire isnโ€™t just about lighting a match and setting wood on fire. Itโ€™s about knowing how to gather materials, understanding the different methods, and respecting the fireโ€™s power. A campfire is more than just a way to stay warmโ€”itโ€™s the centerpiece of your outdoor experience. It’s where stories are told, marshmallows are roasted, and memories are made.

So next time you head out into the wilderness, be sure to gather your materials, build your fire with care, and let it blaze brightly as the heart of your camping adventure.

Pro Tip: Try making your own campfire stories to tell around the fire! Whether theyโ€™re spooky, funny, or full of tall tales, theyโ€™re a perfect addition to any campfire gathering.

The Ultimate Guide to Building Your Own DIY Skateboard

There’s something undeniably thrilling about the idea of riding your very own, hand-crafted skateboard. Whether youโ€™re carving through the streets, pulling off tricks in the park, or just cruising down your favorite hill, a custom-built board can give you that extra sense of freedom. But here’s the real kicker: building your own skateboard is easier than you might think, and itโ€™s a fantastic project that will not only teach you valuable skills, but also give you a board thatโ€™s uniquely yours. Ready to roll? Letโ€™s get started!


Step 1: Choose Your Deck โ€“ The Foundation of Your Skateboard

The deck is the main platform of your skateboard, and itโ€™s where all the action happens. Without a good deck, your board wonโ€™t be much use, so picking the right one is key. Here’s what you’ll need to know:

  • Material: Most skateboard decks are made from maple, but you can also find decks made from bamboo or plastic. Maple is the traditional choice because it’s strong, durable, and gives you the right amount of flex. However, if youโ€™re looking for a lightweight and eco-friendly option, bamboo is a great alternative.
  • Shape & Size: Skateboards come in various shapesโ€”some have a classic, flat outline, while others have a more concave shape for added control. For most beginners, a deck thatโ€™s about 7.5 to 8.5 inches wide is ideal. This width offers a good balance between stability and maneuverability.
  • Where to Get It: You can either buy a pre-made deck from a skate shop, or if youโ€™re feeling particularly adventurous, you can make your own. To make a DIY deck, you’ll need a piece of wood (maple or plywood works best), a jigsaw, sandpaper, and a deck template (which you can easily find online).

Step 2: Attach the Trucks โ€“ Getting the Wheels Rolling

Now that youโ€™ve got your deck, itโ€™s time to attach the trucksโ€”the metal parts that hold the wheels in place and allow you to steer your skateboard. Hereโ€™s what to look for:

  • Choosing Your Trucks: There are two main types of skateboard trucks: traditional and reverse kingpin. Traditional trucks are best for street skateboarding, while reverse kingpin trucks are great for downhill or longboarding. Since youโ€™re building a standard skateboard, traditional trucks should be just the ticket.
  • Width of Trucks: The width of your trucks should match the width of your skateboard deck. For example, if your deck is 8 inches wide, look for trucks in the 7.75โ€ to 8.25โ€ range. Trucks that are too wide or too narrow can affect your ride, so it’s best to get the right size.
  • How to Attach the Trucks: To attach your trucks, simply line them up with the pre-drilled holes in your deck. Using a drill and screwdriver, attach the trucks with screws. Tighten them securely but avoid over-tightening, as you want them to pivot smoothly when you lean into turns.

Step 3: Add the Wheels โ€“ The Grip That Gives You Speed

Wheels are where the magic happens. Without good wheels, your skateboard will feel sluggish and rough to ride. Hereโ€™s how to pick the right ones:

  • Material: Most skateboard wheels are made of urethane, a durable material that gives you the right balance of grip and smoothness. The hardness of the wheels is measured on a durometer scale. Softer wheels (78A to 87A) are perfect for rough surfaces or downhill riding, while harder wheels (88A to 101A) are ideal for smooth, paved streets and street tricks.
  • Size: Skateboard wheels come in various sizes. Smaller wheels (50-52mm) are great for technical street tricks, while larger wheels (54-60mm) are better for cruising and downhill riding. A good middle-ground size for an all-around board is 54mm.
  • Installing the Wheels: Once your trucks are securely attached, itโ€™s time to install the wheels. Slip each wheel onto the axle and secure it with a bearing. Bearings are the small metal pieces that fit inside the wheels and allow them to spin. Tighten the nuts with a wrench, but donโ€™t overdo itโ€”your wheels should spin freely with just a little resistance.

Step 4: Grip Tape โ€“ For Maximum Traction

Grip tape is what helps your feet stay planted on the board, giving you the traction you need for control. Hereโ€™s how to apply it:

  • Cut the Grip Tape to Size: Measure your skateboard deck and cut the grip tape accordingly. Make sure itโ€™s large enough to cover the entire top of your deck. Grip tape comes in large sheets, so be sure to cut it to match the dimensions of your deck.
  • Applying the Grip Tape: Peel off the backing of the grip tape and carefully place it on the top of your deck, making sure itโ€™s centered. Use a knife or razor blade to trim any excess tape along the edges. To make sure the grip tape sticks well, press it down using a roller or a flat tool. You donโ€™t want any air bubbles trapped underneath.
  • Finishing Touches: Use a file to smooth the edges of the grip tape, so there are no rough spots that could cause discomfort while youโ€™re riding.

Step 5: Customize Your Ride โ€“ Making It Your Own

Now that your board is built, itโ€™s time to make it yours. Here are a few ideas to add some personal flair:

  • Paint Your Deck: If youโ€™re feeling artistic, grab some paint and design your own custom graphics on the bottom of your deck. Whether you go for a simple design or a full-on masterpiece, painting your deck will make it truly one-of-a-kind.
  • Add Stickers or Decals: Stickers are an easy way to personalize your skateboard. You can pick them up at your local skate shop, or even design your own and print them out.
  • Test Ride Your Board: Finally, take your new skateboard for a spin! Adjust the trucks if needed to find the right level of responsiveness, and remember: it might take a few rides to get everything dialed in just the way you like it.

Final Thoughts โ€“ Ride Like a King

Building your own skateboard is more than just a fun projectโ€”itโ€™s a way to connect with the history and art of skateboarding. From choosing the right materials to adding your personal touch, every step is a chance to hone your craft and make something truly your own. So grab your tools, gather your materials, and start building a skateboard that will take you on epic rides and give you the freedom to conquer any street or hill that stands in your way.

Happy skateboarding, and remember: every great skateboarder started with the basics, so get out there and build the ride of your dreams!

The Most Important Historical Events of the Past 2000 Years

0

The past two millennia have been marked by a series of monumental events that have shaped the course of history, influenced cultures, and changed the way humans live and interact with each other. In the last 2000 years AD (Anno Domini) here are ten key historical events that stand out for their significance.

1. The Rise of the Roman Empire (27 BCE – 476 CE)

One of the most significant events in ancient history was the rise of the Roman Empire. It transformed much of Europe, North Africa, and the Middle East. From its founding in 753 BCE, Romeโ€™s military conquests and innovative governance led to the establishment of an empire that spanned over three continents.

  • Why itโ€™s important: The Roman Empire introduced groundbreaking systems of law, engineering (like roads, aqueducts, and buildings), and governance that have influenced Western civilization profoundly. Its fall in 476 CE marked the end of the classical age and the beginning of the Middle Ages.

2. The Fall of Constantinople (1453)

Gorgon Medusa in the Basilica Cistern. YaryGin/shutterstock

The fall of Constantinople to the Ottoman Turks in 1453 was a turning point in world history. This event marked the end of the Byzantine Empire, a continuation of the Roman Empire, and the rise of the Ottoman Empire, which would dominate the Middle East for centuries.

  • Why itโ€™s important: The fall of Constantinople disrupted trade routes between Europe and Asia, prompting European nations to seek new routes to the East. This, in turn, led to the Age of Exploration. Additionally, it marked the spread of Islamic culture into Europe and the end of Christian dominance in the East.

3. The Age of Exploration (15th to 17th Century)

From the late 15th century, European explorers like Christopher Columbus, Vasco da Gama, and Ferdinand Magellan set out to discover new lands, seeking new trade routes to Asia. These explorations led to the discovery of the Americas and the establishment of global trade networks.

  • Why itโ€™s important: The Age of Exploration directly resulted in the Columbian Exchange, which facilitated the movement of goods, people, and ideas across continents. This era also led to European colonization, profoundly altering the worldโ€™s political, economic, and social structures.

4. The Industrial Revolution (18th to 19th Century)

The Industrial Revolution, which began in Britain in the late 18th century, revolutionized the way people lived and worked. The development of machinery, the steam engine, and new manufacturing processes completely transformed economies and societies around the world.

  • Why itโ€™s important: This period marked the shift from agrarian economies to industrialized, urbanized societies. It laid the foundation for modern capitalism, drastically improved production capacity, and changed the global labor market, but it also caused significant environmental changes and social inequalities.

5. The French Revolution (1789 – 1799)

The French Revolution was a radical period in French history, during which the people overthrew the monarchy and established a republic. The Revolution introduced ideas of liberty, equality, and fraternity, which influenced political thought across the globe.

  • Why itโ€™s important: The French Revolution inspired revolutions in other countries and laid the groundwork for modern democratic principles. It challenged old social structures, including the feudal system, and led to the rise of secularism and the spread of nationalism.

6. World War I (1914 – 1918)

World War I, also known as the Great War, was a global conflict that involved most of the worldโ€™s great powers, including European empires and their colonies. The war caused widespread destruction and led to the collapse of several empires, including the Austro-Hungarian, Russian, Ottoman, and German Empires.

  • Why itโ€™s important: World War I reshaped the global order, led to the formation of new nations, and significantly altered the political landscape of Europe. The Treaty of Versailles, which ended the war, laid the groundwork for World War II, which would come just two decades later.

7. World War II (1939 – 1945)

World War II was the deadliest and most widespread conflict in human history, involving most of the worldโ€™s nations. It resulted in the defeat of Nazi Germany, Imperial Japan, and Fascist Italy, and the emergence of the United States and Soviet Union as superpowers.

  • Why itโ€™s important: The war led to the Holocaust, the use of atomic bombs on Japan, and significant changes in global power dynamics. It also set the stage for the Cold War and the creation of the United Nations, designed to prevent future global conflicts.

8. The Civil Rights Movement in the United States (1950s – 1960s)

The Civil Rights Movement was a struggle by African Americans to end racial discrimination and secure equal rights under the law. It saw key events like the Montgomery Bus Boycott, the March on Washington, and the passing of the Civil Rights Act of 1964.

  • Why itโ€™s important: The movement not only led to the desegregation of schools, public facilities, and the workforce in the U.S., but it also inspired civil rights movements around the world. It marked a fundamental shift in American society toward greater equality and justice.

9. The Fall of the Berlin Wall (1989)

Brandenburg Gate in Berlin. Dragnea Laurentiu Ficuta/shutterstock

The Berlin Wall, erected in 1961, divided East and West Berlin and symbolized the broader division of East and West during the Cold War. Its fall in 1989 marked the end of the Cold War and the collapse of communist regimes across Eastern Europe.

  • Why itโ€™s important: The fall of the Berlin Wall signaled the end of Soviet influence in Eastern Europe and led to the reunification of Germany. It also contributed to the eventual dissolution of the Soviet Union in 1991 and the spread of democracy and capitalism in Eastern Europe.

10. The Digital Revolution (Late 20th Century – Present)

The Digital Revolution refers to the rapid advancement of digital technology, from the development of the personal computer to the internet and smartphones. This transformation has affected nearly every aspect of modern life, from communication and entertainment to business and education.

  • Why itโ€™s important: The Digital Revolution has revolutionized how people access information, communicate, and interact with the world. It has accelerated globalization, disrupted traditional industries, and led to the rise of tech giants like Apple, Google, and Facebook. Today, digital technology is at the core of nearly every aspect of modern society, shaping economies, politics, and culture.

Conclusion

The past 2,000 years have witnessed events that have profoundly altered the course of human history. From the rise and fall of empires to revolutions, wars, and technological innovations, these events have shaped the world we live in today. Each of these moments has left a lasting legacy, influencing everything from politics and economics to culture and social structures. Understanding these key events helps us make sense of the world we live in and prepares us to face the challenges of the future.

5 essential strategies to accomplishing your goals

Setting goals is the easy partโ€”achieving them is where the real challenge lies. Whether personal or professional, goals require focus, discipline, and the right approach. Here are five proven strategies that can help you turn your ambitions into reality.

1. Set Clear and Specific Goals

One of the most common mistakes people make when setting goals is keeping them too vague. Instead of saying, โ€œI want to get healthier,โ€ try something specific, like, โ€œI want to lose 10 pounds in three months by working out 4 times a week and eating a balanced diet.โ€ The clearer your goal, the easier it is to break it down into manageable steps and stay on track. Make your goals SMARTโ€”Specific, Measurable, Achievable, Relevant, and Time-boundโ€”to enhance clarity and focus.

2. Break Goals Into Smaller Tasks

A big goal can feel overwhelming, and when it seems too far out of reach, itโ€™s easy to procrastinate. To avoid feeling discouraged, break your goals into smaller, more manageable tasks. For example, if your goal is to write a book, start with a target of writing 500 words a day, or even 100 words per sitting. These small victories add up over time and build momentum, making the larger goal seem more attainable.

3. Develop a Routine and Stick to It

Consistency is key when it comes to achieving any goal. Building a daily or weekly routine that aligns with your objective will keep you on track. Set aside dedicated time each day or week to work on your goalโ€”whether itโ€™s reading, exercising, or improving your skill set. Establishing this routine turns the goal from a distant dream into a daily habit, making it easier to stay focused and make progress over time.

4. Stay Accountable

Itโ€™s much harder to let go of a goal when someone else is holding you accountable. Share your goals with a trusted friend, family member, or mentor who can check in on your progress. You can even create an accountability group with others working on similar objectives. Tracking your progress and getting feedback helps you stay motivated and committed, even when things get tough.

5. Embrace Setbacks as Learning Opportunities

No path to success is linearโ€”there will be setbacks along the way. Whether you miss a deadline, experience a failure, or face unexpected challenges, itโ€™s important to shift your mindset. Instead of seeing setbacks as defeats, view them as opportunities to learn and grow. Ask yourself what went wrong, what you can do differently next time, and how you can improve. This resilient mindset will help you bounce back stronger and continue working toward your goals.


Final Thoughts
Accomplishing your goals takes time, patience, and persistence. By setting clear, specific goals, breaking them into smaller tasks, creating a consistent routine, staying accountable, and learning from setbacks, youโ€™ll be on your way to turning your dreams into reality. Remember, the key is progress, not perfection. Stay focused, stay positive, and keep moving forwardโ€”one step at a time.